
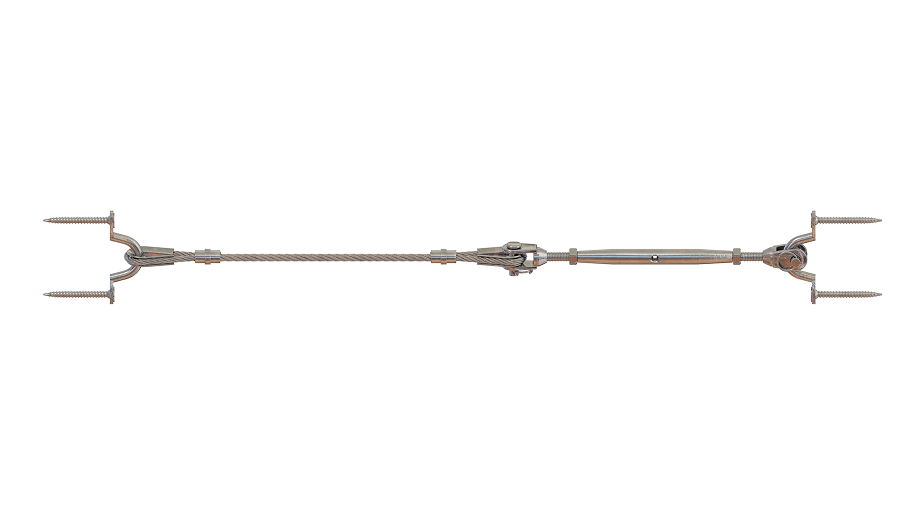
Homeowners planning a deck, staircase, or balcony upgrade often search for reliable wire balustrade supplies before starting the project. A well-planned installation gives you a modern, open railing that lets light and views through without sacrificing safety. This guide walks through each stage of installing the Miami Stainless Standard DIY System for Timber Posts, from measuring your space to tensioning the final wire, and points you toward the tools and materials needed along the way.
Before you pick up a drill, it helps to understand the parts involved. The Standard DIY System kit includes bottlescrews, thimbles, swage sleeves, saddle eye straps, and self-tapping screws, plus the stainless steel wire rope itself (sold separately, priced per metre). Getting the right components from the beginning will save effort and avoid expensive, unpleasant mistakes later on.
Choosing the Right Wire Balustrade Supplies
Not all kits are equal. Quality wire balustrade supplies determine how long a railing lasts and how easy it is to fit. Look for marine-grade stainless steel wire rope, corrosion-resistant fittings, and posts rated for outdoor exposure. Miami Stainless offers a full range of components designed for coastal and residential settings, so the hardware holds up against salt air, rain, and UV exposure over time.
The Standard DIY System is a true do-it-yourself kit suited to timber posts, using hand-swaged fittings rather than mechanical grip fittings. Installation requires a hand swaging tool and a set of wire rope cutters, so it’s a more hands-on process than some of Miami Stainless’s other systems — but that’s exactly what makes it a budget-friendly option for DIYers comfortable with basic tools.
Step 1: Plan and Measure
Measure the total length of the railing to be installed and determine where posts and intermediate supports will be required. Check the current NCC wire balustrade regulations for minimum wire spacing for a standard 1-metre-high handrail using 3.0mm 7×7 wire, this is typically 80mm spacing between wires, or around 11 runs, to prevent gaps that could pose a fall risk for children or pets. The Standard DIY System can span up to 10 metres in a single run, or up to 16 metres when using a tensioner at each end.
Step 2: Mark and Drill the Holes
Mark and drill all holes at the required spacing, keeping every hole level with its counterpart on the opposite post. A 4mm hole through your intermediate (middle) posts allows the stainless steel wire to pass through cleanly. Using a template to mark out the holes helps keep spacing consistent along the run, especially useful on longer sections.
Tip: If you’re running wire through tube or square metal posts in the middle of a timber run, use grommets to stop the wire chafing where it passes through — if you’re using grommets, drill an 11/32″ hole instead of the standard 4mm.
Step 3: Create the First Loop and Swage It
Slide one end of your wire through a swage sleeve and guide it around a thimble. Complete the loop by inserting the end of the wire back through the swage sleeve, leaving about 2mm of wire protruding. Swage the sleeve twice, spaced slightly apart, using your hand swaging tool.
Step 4: Attach the First Saddle and Thread the Wire
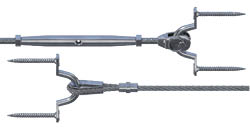
Insert a saddle (eye strap) through the loop you’ve just created and mount it to your end post using the screws provided on timber posts, the saddles are simply screwed straight into the wood. With the saddle fixed to your end post, pull the wire straight through to the inside face of the opposite end post and cut it roughly 100mm shorter than that distance. Pass the wire through your pre-drilled intermediate posts, then create a second loop at the other end following the same swaging method as Step 3.
Step 5: Attach the Bottlescrew and Second Saddle
Attach a saddle to the opposite end post using timber screws. Remove the pins from both ends of your bottlescrew by unfastening both split rings. Attach one end of the bottlescrew to the loop in your wire, and the other end to the mounted saddle, then reinsert the pins and rings. You can adjust tension by screwing or unscrewing the middle section of the bottlescrew by hand — a ProRig Multi Tool is available as an optional add-on if you want an easier grip while tensioning.
Step 6: Tension and Lock Off
Tighten each cable one by one, from bottom to top, until you feel that there is no slack in it. Once the proper tension has been applied to the wire, secure it to the body of the bottlescrew by locking the hex nuts. It’s best to use a tension gauge for an accurate measurement; otherwise, a simple deflection test pressing the wire and checking it doesn’t move more than a few millimetres will get you close.
Step 7: Final Inspection
After tensioning every wire, walk the length of the railing and check spacing, tightness, and post stability. Confirm every fitting is correctly aligned with good metal-to-metal contact, and that no wire sags more than a few millimetres under pressure.
Why Material Quality Matters
Coastal properties place heavy demands on outdoor hardware. Grade 316 stainless steel wire rope resists rust far better than standard grades, which matters if a railing sits near the ocean or a pool. Cutting corners on material quality often leads to premature corrosion or fitting failure within a few years.
Reliable wire balustrade supplies pay off in long-term maintenance. Higher-quality parts need less frequent tightening and cleaning, while a cheaper wire kit can loosen or stain within a single season. Sourcing every part of your kit — wire, sleeves, saddles, and bottlescrews — from one supplier also avoids compatibility issues between mismatched fittings and cable diameters.
Common Mistakes to Avoid
- Wide spacing between posts — when the distance between intermediate posts is excessive, the wire can sag and fall out of compliance with code requirements.
- Skipping the template — marking holes freehand often leads to misalignment, making it harder to pull the lines taut and level.
- Tensioning too fast — pulling lines up to tension too quickly can bow the end posts or leave lines loose once the timber settles.
- Mismatched fittings — using fittings sized for the wrong cable diameter results in weak, unreliable joints.
- Skipping the manufacturer’s guide — tolerances vary slightly between kits, and working from memory instead of the official instruction manual is an easy way to make avoidable mistakes.
Planning ahead and sourcing all your wire balustrade products from one kit helps you avoid most of the mistakes above.
Conclusion
A DIY wire railing project becomes manageable when you plan carefully and choose quality materials from the start. Every stage, from mounting posts to tensioning lines, is geared toward safety and longevity. Sourcing high-quality wire balustrade supplies from a reputable supplier like Miami Stainless will add years to your project’s life and leave you with a clean, professional result. If you’d like a visual walkthrough alongside these steps, Miami Stainless’s official installation video covers the whole process start to finish. Ready to get started? Visit Miami Stainless today to browse the Standard DIY System, fittings, and stainless steel cable built for Australian conditions.
FAQs
1. Can I install this method myself?
Yes, even someone with no prior experience can install the Standard DIY System, though it does require hand swaging on-site.
2. Do I need special tools?
Other than common handyman tools such as an electric drill and drill bits, you’ll need a hand swaging tool and a set of wire rope cutters. A ProRig Multi Tool is available as an optional add-on for easier tensioning.
3. What size and type of stainless steel wire should I use?
This system almost always uses 3.0mm 7×7 stainless steel wire rope, valued for its bright finish, appearance, strength, durability, and low stretch.
4. What’s the maximum length I can run?
The Standard DIY System can span up to 10 metres in a single run. Longer runs of up to 16 metres are achievable with a tensioner at each end — contact Miami Stainless for guidance on longer spans.
5. Can I take the balustrade around corners?
It’s not recommended. Bending the wire around corners can fatigue it, put excessive stress on the posts, and make it difficult to achieve the tension required to meet NCC regulations.